Microsoft Warning Alert notifications – how to delete?
Internet visitors see meet Microsoft Warning Alert pop-ups in any popular browsers, they alert about serious about troubles with the system. They are marked as Support.microsoft.com (fake) site and appeal to users with suspicious frequency that really annoys. Your PC is most likely to get a hijacker that could install the adware and start a slew of pop-ups in the browser.

Be careful while using Google Chrome, Mozilla Firefox, Internet Explorer, they display notifications which may confuse Internet visitors with their presence. The Microsoft Warning Alert alerts usually appear after the adware penetration and inject advertisement banners into the browser. Be mindful and keep reading to know how to avoid this malicious item and block the adverts.
Remember that you should not trust the Microsoft Warning Alert alerts without any proofs. Be careful with fake statistics and suspicious reports of the security which notifications have revealed. Third-party software does not have access to the system of your PC so it cannot scan it. Watch out these fake alerts in Google Chrome, Mozilla Firefox, Internet Explorer, and some other Internet browsers.

To stop Microsoft Warning Alert notifications once and forever start regular scanning of the system with a powerful anti-malware scanner like GridinSoft Anti-Malware software in action. Clear guidance you see below the text will help you to do everything fast. Remember to reset infected browsers.
How to remove Microsoft Warning Alert?
If you decided to use the removal tool, all you need to do is to follow the next steps:
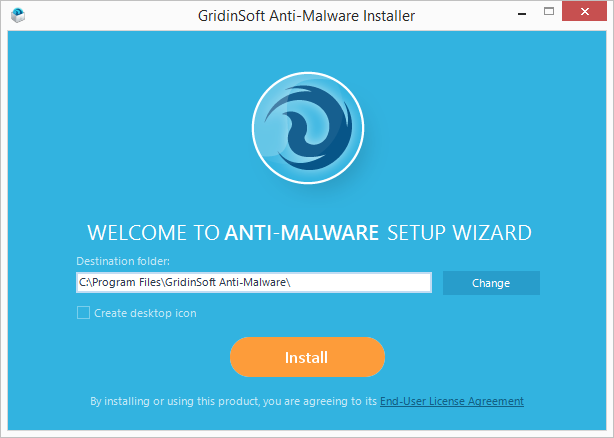
Step 1. Download and install Microsoft Warning Alert removal tool from the link below.

The installation process is very simple, you need to choose the “Installation folder” and press “Install” button to proceed, the installation process will begin.
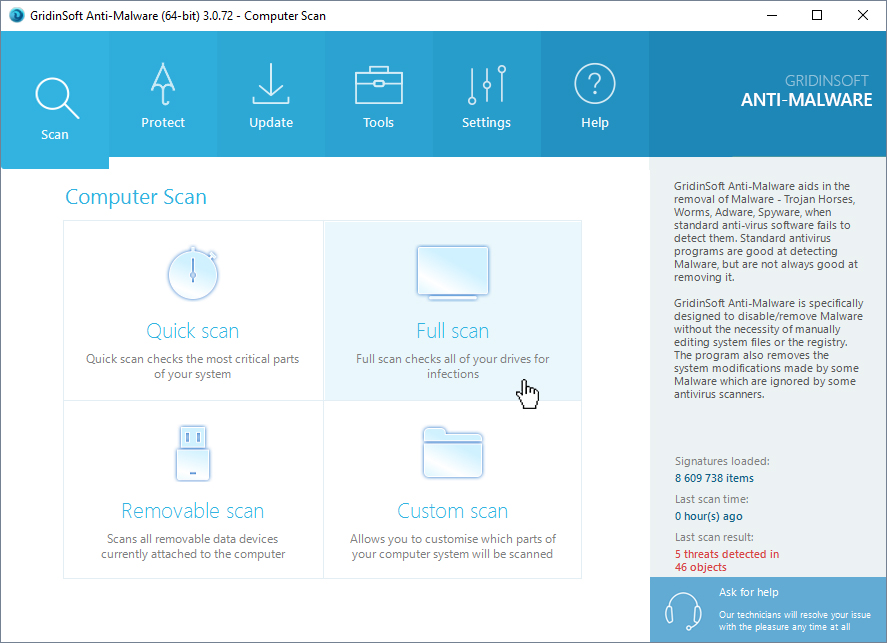
Step 2. Run the scan of your PC.
NOTE: Before you start to scan your computer, CLOSE ALL ACTIVE BROWSER WINDOWS on this time.
After the installation, start the program. Every time when you run this anti-virus it will start an automatic standard scan of your computer. You will have 5 seconds to cancel the scan if you don’t need it. Otherwise, the scan will begin automatically. There are other ways to start scan manually. Just Press on “Scan” tab and than left-click on “Full scan” or another kind of scan you need. Full scan is adviced, but due to performance problems because of the virus you may also choose “Quick scan”.
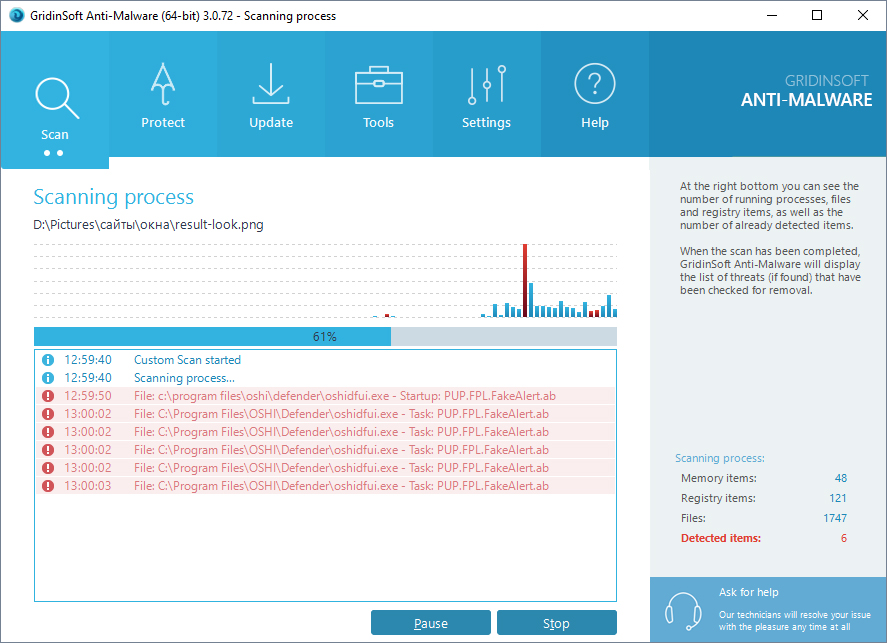
After the start of scanning process you will see the screen with progress bar and alerts, that will show you what kind malicious files Anti-Malware found during the scan and the exact location of it.
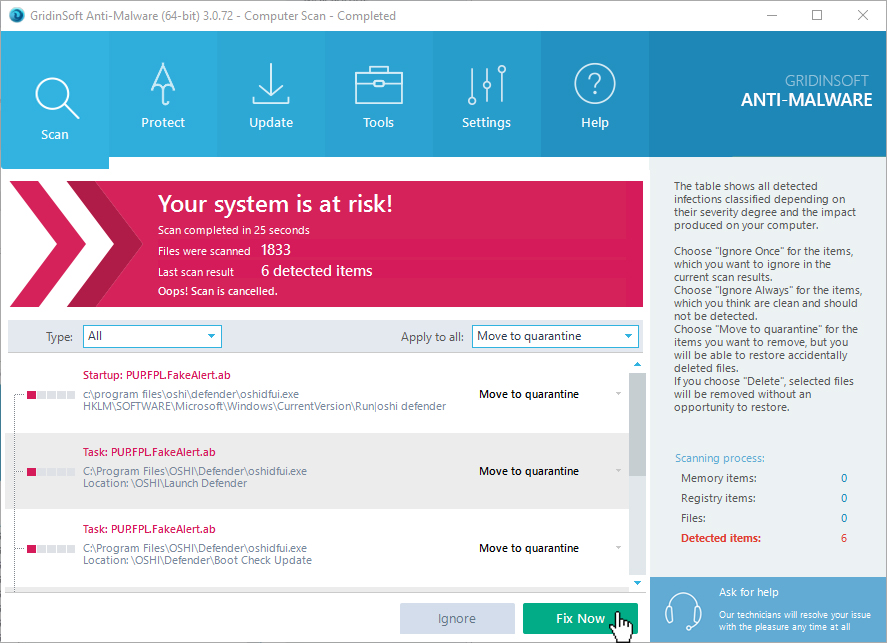
Step 3. Apply actions to Microsoft Warning Alert infected files.
NOTE: To be able to remove detected items you need to purchace a license. This program has FREE tools available, that will help you in most cases (Go to STEP 4) and works as a FREE scanner. The removal function removes 50% of detected items by choosing most dangerous from them.
When the scanning process of your PC will be finished, Anti-Malware will show you all threats that were found on your PC and a list of actions, that you can Apply to them. First, you can select what kind of action you want to Apply to this malware. Then, press “Fix now” button to produce action and delete all threats.
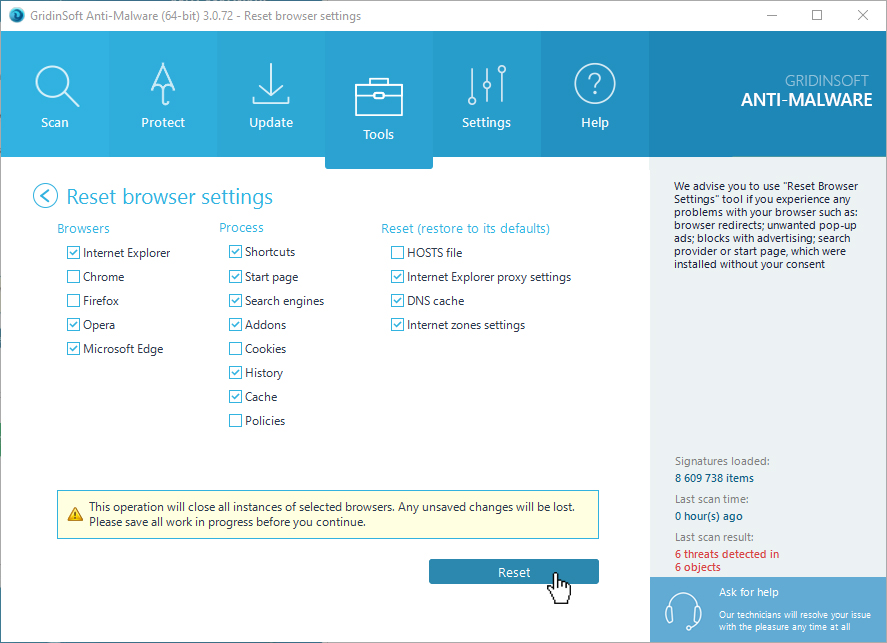
Step 4. Reset you browser settings.
NOTE: This operation will close all instances of selected browsers. Any unsaved changes will be lost. Please, save all work in progress before you continue.
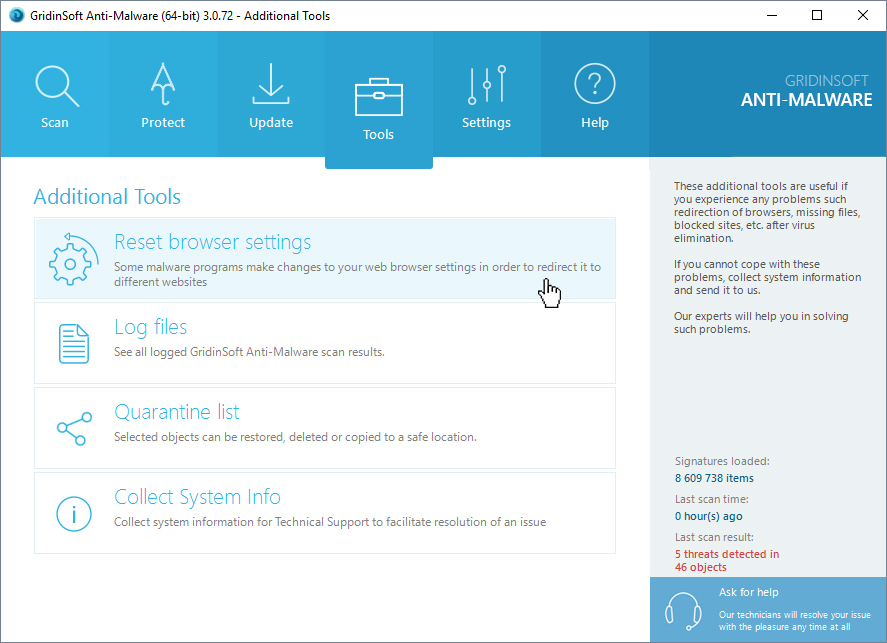
When you eliminated Microsoft Warning Alert we strongly recommend you to reset your browser settings. For that, you can go to “Tools” tab and press “Reset browser settings” button.
NOTE: This function is FREE to use in all version of program and will help you in most cases.
You will see the window with options. You can choose what Internet browser and the exact options you want to reset.
How to prevent the Microsoft Warning Alert infection:
Removing the malware from your PC is a good thing. But it doesn’t mean that you will be protected from the repeated infection. The best way to deal with this adware is to not get infected in the first place. If you want to prevent the infection follow the simple tip below:
- Do not install free applications from unreliable websites!
- If you did download this kind of program, select custom installation and remove any tick in the checkbox that seems questionable.
- Use an anti-virus software on your PC.
- Scan your Computer at least once a week.
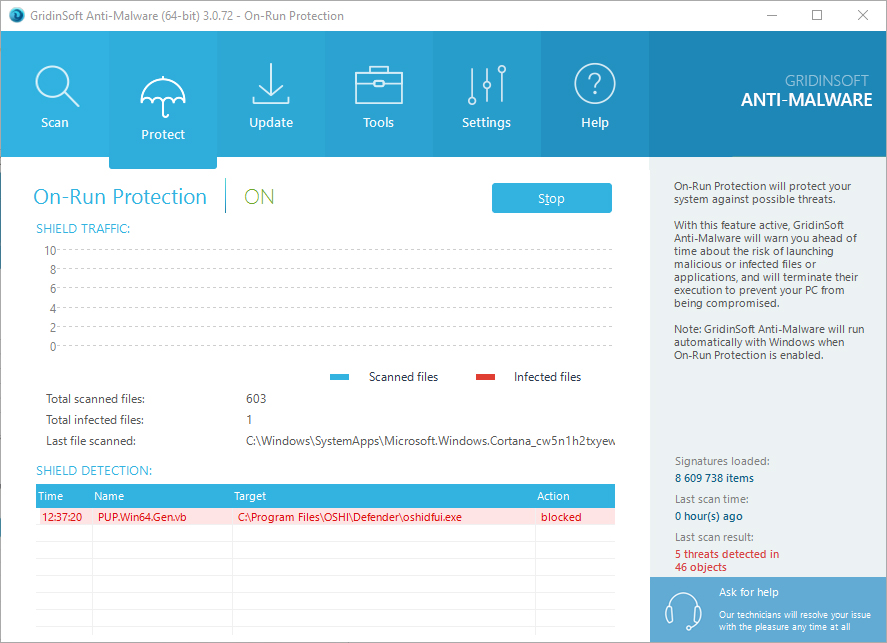
Also, you can activate the On-run protection in Anti-Malware. To do that, go to the “Protection” tab and press “Start” button to the right of the label.
If you consider yourself a skilled user, you can try to delete this adware on your own. We must remind you when you eliminate adware manually, all the unexpected consequences and risks are lying on you and you alone. So let’s begin!
Manual removal guide for Microsoft Warning Alert:
Removing Microsoft Warning Alert should be your main concern. First, you must delete this add-on as a software from your PC. Right after cleaning all of the folders you’ll be able to begin cleaning up the web browser. Before removing Microsoft Warning Alert pop-ups, it’s necessary to totally reset the web browser. If you still thinking about manual removal of Microsoft Warning Alert malware, follow these steps below:
Step 1. Remove Microsoft Warning Alert from your PC.
To delete Microsoft Warning Alert from your computer, you can find the “Uninstall the program” tool on your Operation System.
- Windows 8/10: Right-click on Start – Quick Access Menu – Control Panel – Uninstall a program. You will see the list of programs and software, that is installed on your PC. Find “Microsoft Warning Alert”, click on it and press ‘Uninstall”
- Windows 7: Click on Start – Control Panel – Uninstall a program. You will see the list of programs and software, that is installed on your PC. Right-click on “Microsoft Warning Alert” and press ‘Uninstall”.
- Windows XP: Click on Start – Control Panel – Add/Remove Programs. Similar windows with the list of programs will show you. Right-click on “Microsoft Warning Alert” and press “Remove”
Sometimes it may be not an easy task to locate Microsoft Warning Alert virus as installed program, it may not be a program at all or mask itself by another name. In these cases use the removal tool to avoid any mistakes and complications.
Step 2. Browser setting reset guide
After you removed the Microsoft Warning Alert you will need to reset browser settings. To do it, follow the tips below:
- If you have Google Chrome Browser go to the “Settings” tab and press “Show advanced settings”. In the bottom of the page click in “Reset settings” button.
- For the Mozilla Firefox press the “Refresh Firefox” button in the right top corner.
- Opera users can reset settings by deleting “Operapref.ini file” in folder “C:\Users\user_name\AppData\Roaming\Opera\Opera\”.
- For Internet Explorer users open “Tools” menu, than click “Internet options”. In the next window click “Advanced” button and than press “Reset”.
If the manual removal guide didn’t work for you or it worked with unwanted consequences we strongly recommend you to install the automatic Microsoft Warning Alert removal tool and follow the steps from Automatic removal guide for Microsoft Warning Alert Support.microsoft.com (fake). You can find this guide higher. Use the link below to download the particular tool.
We hope this guide helped you with your problem. If you have any questions about Microsoft Warning Alert or you have some thoughts about viruses, that you’d liked to share, please, leave a comment below. We will be happy to assist you.


